一步一步配置Typescript工程
这里列举一下本工程配置的步骤,有兴趣可以了解。
README模板选择
LICENSE模板选择
项目初始化
初始化project
1
2
3
4
5
# 初始化仓库
git init
# 初始化package信息
npm init.gitignore.editorconfig.browserlistrc目标环境
在线生成及查看浏览器覆盖情况
Babel安装和配置
Babel的相关文档链接
安装
- 安装Babel
1 | npm i --save-dev @babel/core @babel/cli @babel/preset-env @babel/preset-typescript |
- 安装proposal
1 | npm i --save-dev @babel/plugin-proposal-class-properties @babel/plugin-proposal-object-rest-spread |
- 安装polyfill
@babel/polyfill在babel v7.4.0之后为deprecated1
2
3# 如果需要polyfill
# 注意:core-js版本, babel 7.4.0之后@babel/polyfill过时,默认依赖core-js@2版本,也可以指定3
npm i @babel/polyfill core-js
1 | // 如果之前在entry这么引入polyfill |
Babel配置
仅供参考,你可以自己自定义
1 | // babel.config.js |
eslint配置
安装eslint并初始化
因为TypeScript官方团队选择支持eslint,所以以后还是选择eslint玩吧。
2
3
4
5
npm i -D eslint
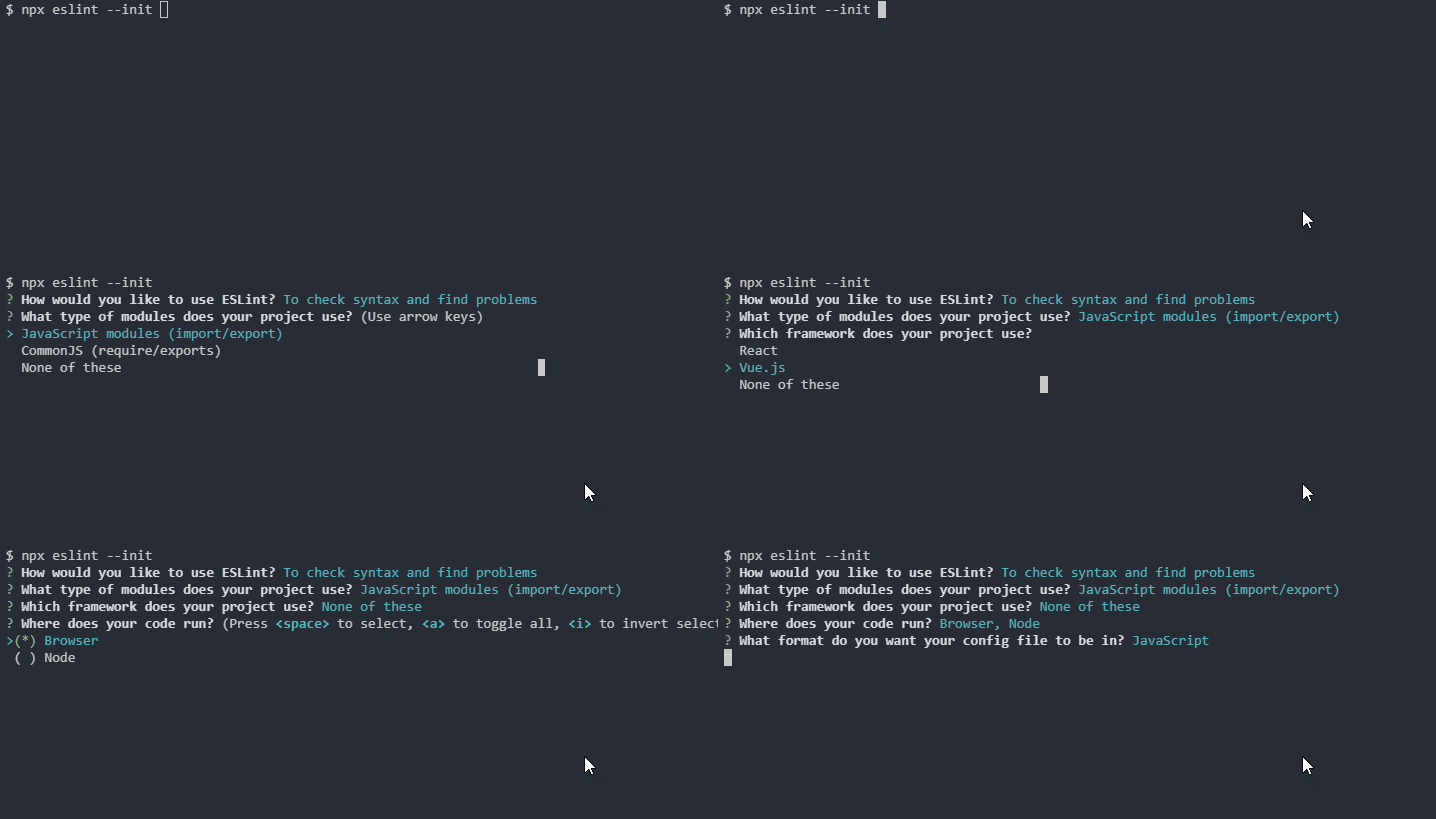
# 生成默认的配置,因为格式化是ts,默认先不选代码风格
npx eslint --init

安装TypeScript解析器和插件
typescript-eslint
因为eslint的解析器不认识TypeScript,所以这里需要替换掉默认的parser
2
npm i --save-dev typescript @typescript-eslint/parser
代码风格(typescript-eslint + Prettier + airbnb)
@typescript-eslint/eslint-plugin文档
@typescript-eslint/eslint-plugin支持的规则
1 | # 安装@typescript-eslint/eslint-plugin |
Prettier一起使用(可选)
1 | npm i --save-dev eslint-config-prettier |
airbnb一起使用(可选)
1 | # 注意:官方文档要求npm 5+ |
eslint的最终的配置
1 | // .eslintrc.js |
因为eslint默认识别.js结尾的文件,这里需要指定下文件后缀
eslint之后是文件夹, –ext参数才生效,如果是具体的正则表达式则匹配–ext被忽略
2
3
4
5
6
{
"scripts":{
"lint": "eslint src --ext .js,.ts,.tsx,.jsx"
}
}
TypeScript配置
tsconfig.json初始化
1 | npx tsc --init --declaration --allowSyntheticDefaultImports --target esnext --outDir dist |
添加scripts命令
2
3
4
5
6
7
8
9
10
{
"scripts": {
"checktypes": "tsc --noEmit",
"checktypes:watch": "npm run checktype -- --watch",
"build": "npm run build:types && npm run build:js",
"build:types": "tsc --emitDeclarationOnly",
"build:js": "npx babel src --out-dir dist --source-maps inline --extensions .ts,.tsx"
}
}
package.json指定声明文件入口
2
3
4
// 如果不指定默认查找project根目录的index.d.ts
"types": "dist/index.d"
}
webpack
安装webpack
1 | npm install --save-dev webpack webpack-cli babel-loader |
配置webpack
1 | // webpack.config.js |
1 | // package.json |
约定式提交
commit message style校验
commitlint安装
1
npm install --save-dev @commitlint/config-conventional @commitlint/cli
commitlint配置
1
echo "module.exports = {extends: ['@commitlint/config-conventional']}" > commitlint.config.js
husky和lint-staged安装
1
2# 安装
npm i husky lint-staged --save-devhusky配置
1
2
3
4
5
6
7
8
9// package.json 配置
{
"husky": {
"hooks": {
"commit-msg": "commitlint -E HUSKY_GIT_PARAMS", // 配合commitlint使用
"pre-commit": "lint-staged" // 配置lint-staged
}
}
}lint-staged配置
1
2
3
4
5
6
7
8
9// package.json
{
"lint-staged": {
"src/**/*.{js,ts,tsx,jsx}": [
"eslint src --fix --ext .ts,.js,.tsx,.jsx", // npm run lint
"git add"
]
}
}
TODO
完成了大部分工程涉及的工具的配置,还有测试相关没有进行配置,以后有时间继续。
[ ] jest
[ ] jest + typescript